This tutorial is for installing your Elementor theme. If you already have the Elementor and Elementor Pro plugins installed and activated, you can skip Step 1 and proceed directly to Step 2: Uploading the Theme. For tutorial purposes, I am using the Isla theme. However, the same steps apply to all of my Elementor templates.
If you are installing this theme on an existing website, I highly recommend backing up your website before proceeding.
⸻
Installing the Elementor and Elementor Pro Plugins
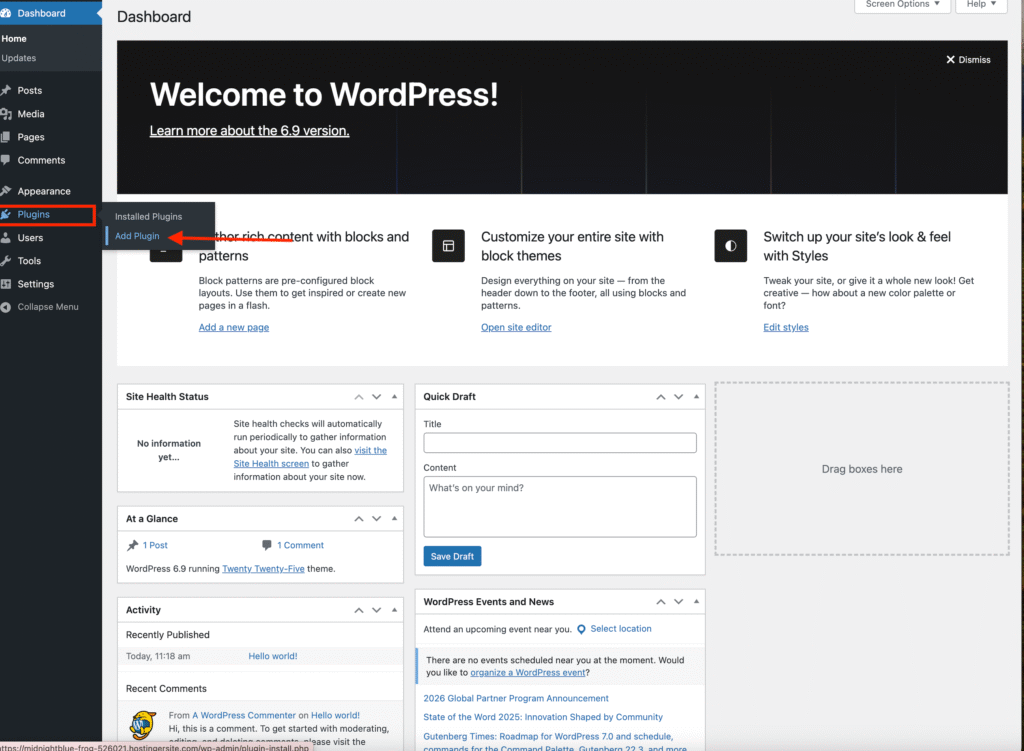
• Navigate to your WordPress Dashboard, go to Plugins, and click Add Plugin.
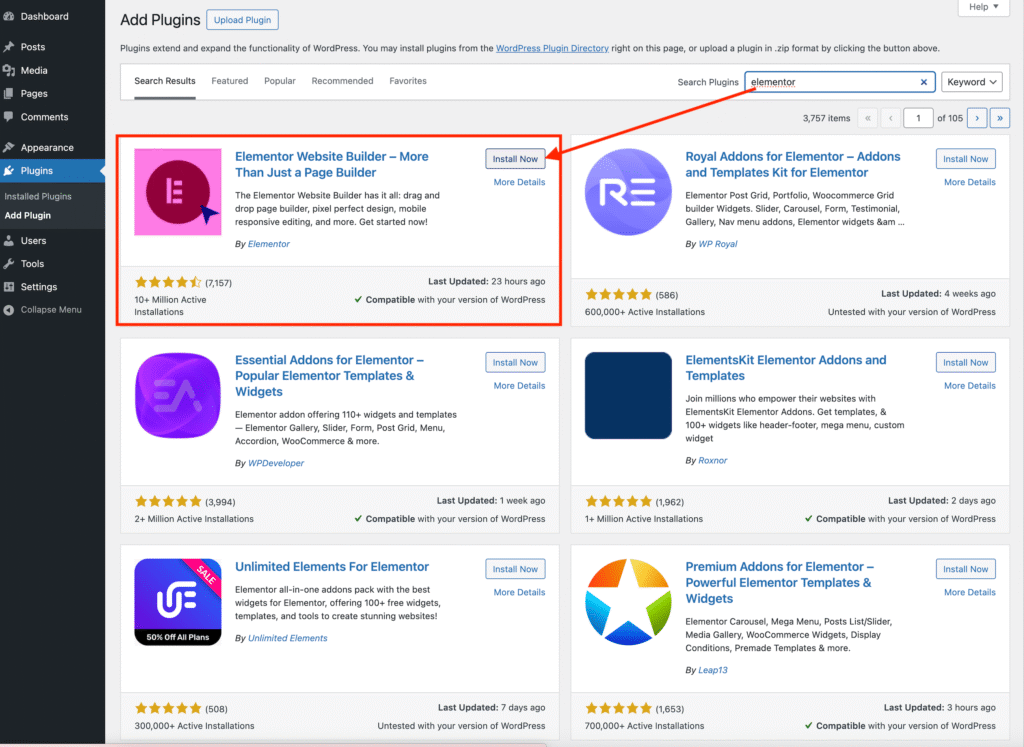
• In the search bar, type Elementor, then click Install. Once the installation is complete, click Activate.
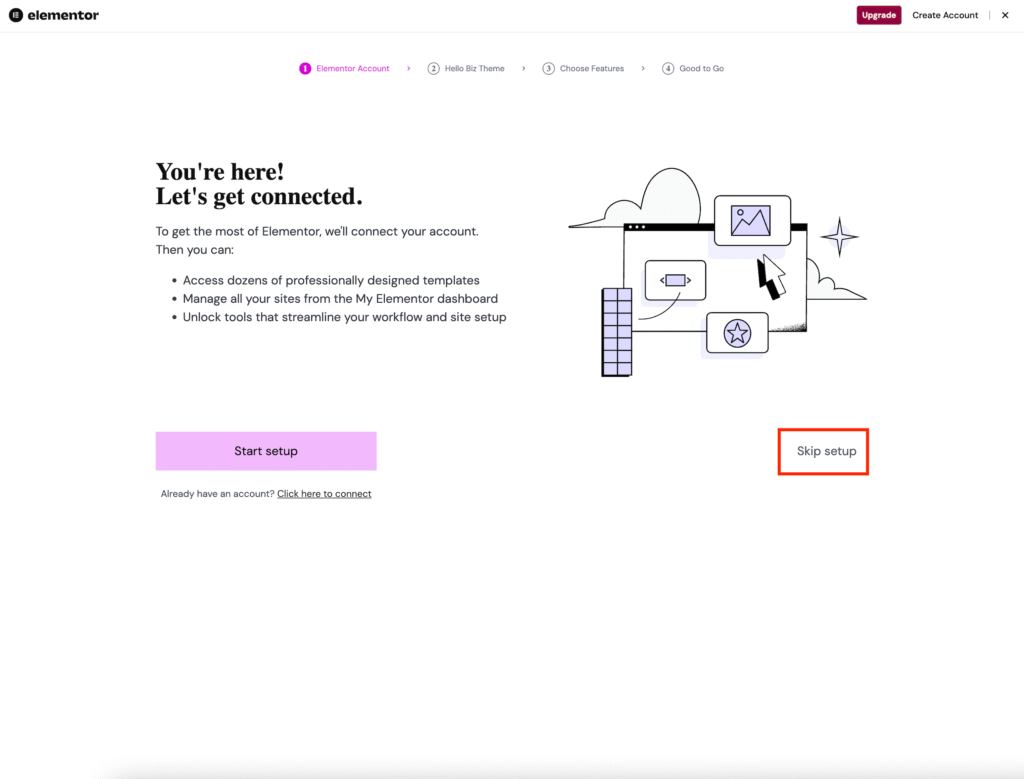
• After activation, Elementor will redirect you to a setup page. Click Skip Setup (you can complete this later if needed).
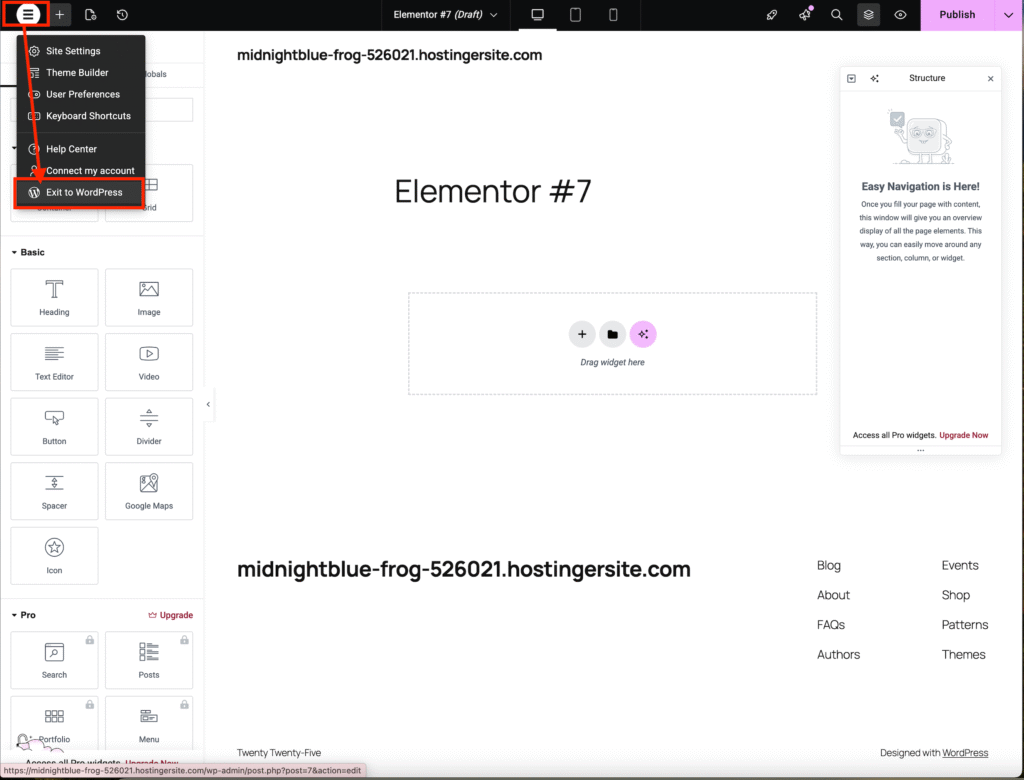
• You will then be taken to the Elementor builder interface. Since we are not ready to use it yet, click the menu icon on the left-hand side and select Exit to WordPress.
• Next, return to your dashboard , navigate to plugins and click the Upload Plugin button.
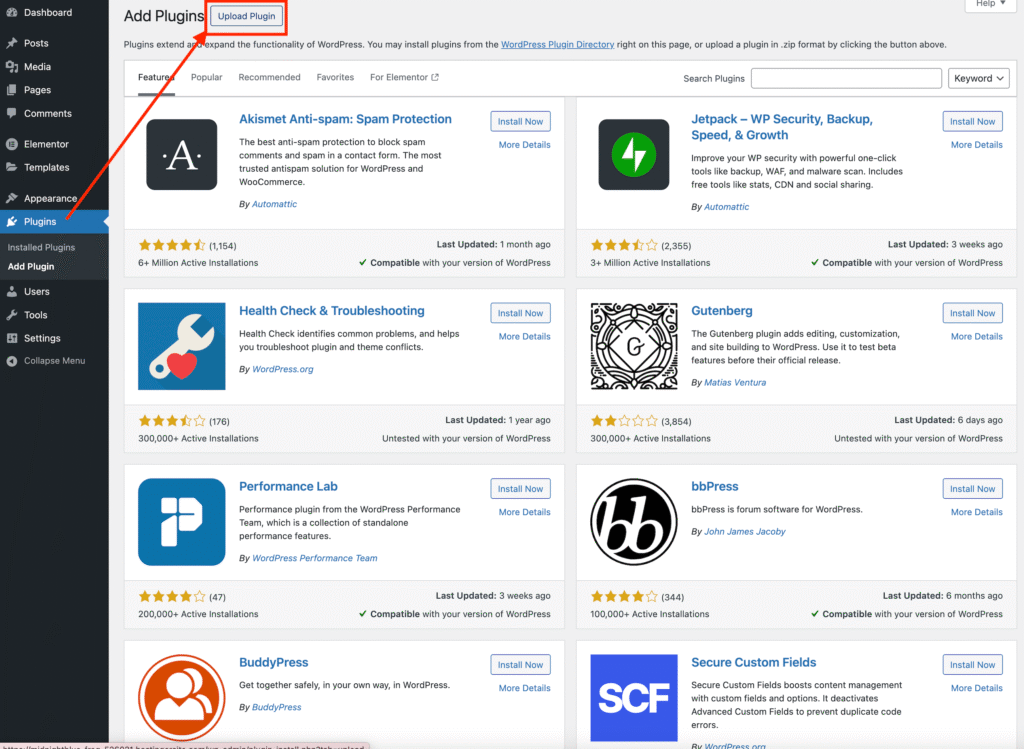
• Upload the Elementor Pro plugin ZIP file you received after purchasing Elementor Pro.

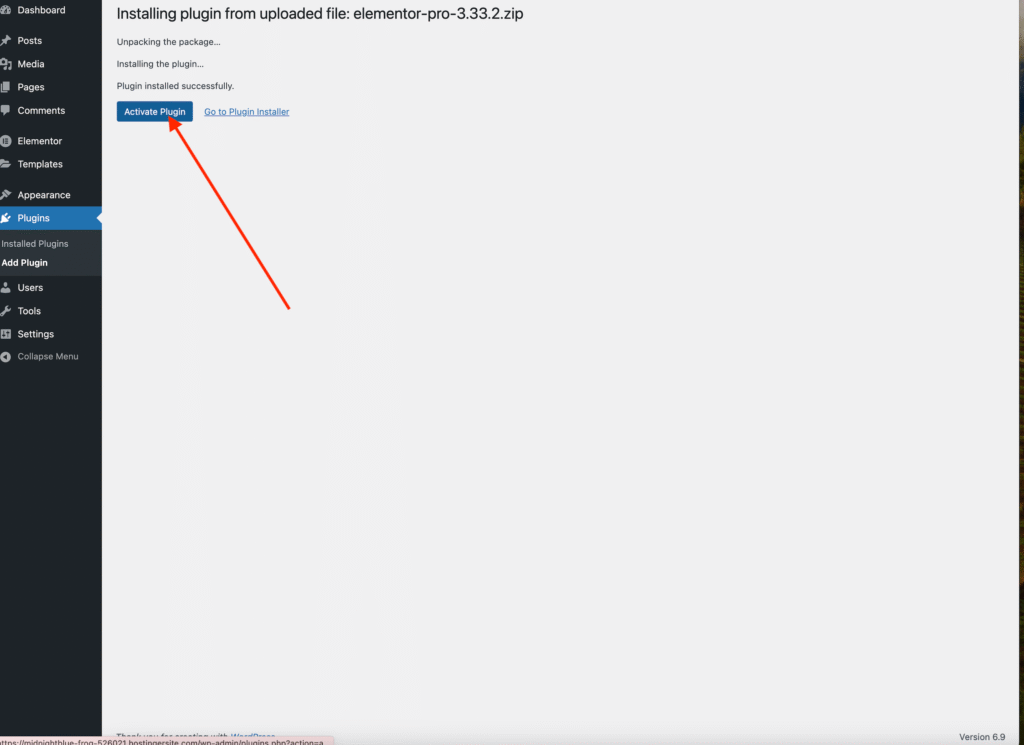
• Click Install Now, then Activate plugin once the installation is complete.
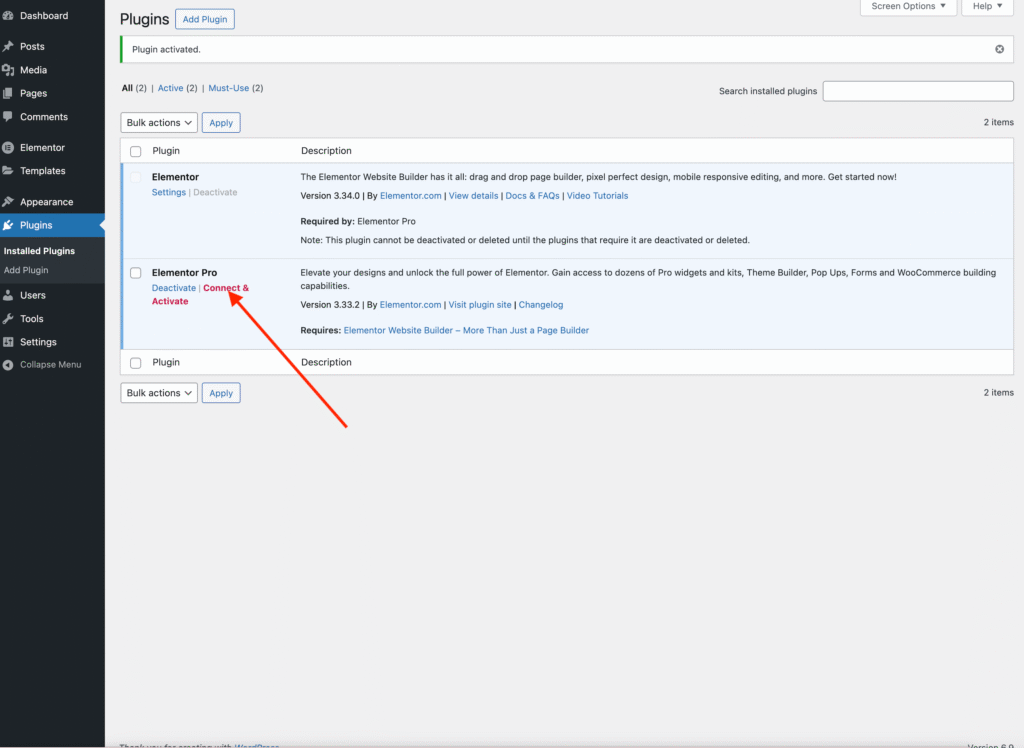
• On the Plugins page, you should now see both Elementor and Elementor Pro installed and activated.
To proceed, you must connect and activate your license for the pro.
• Click the Connect & Activate button and connect the license you received from Elementor.
Uploading the Theme
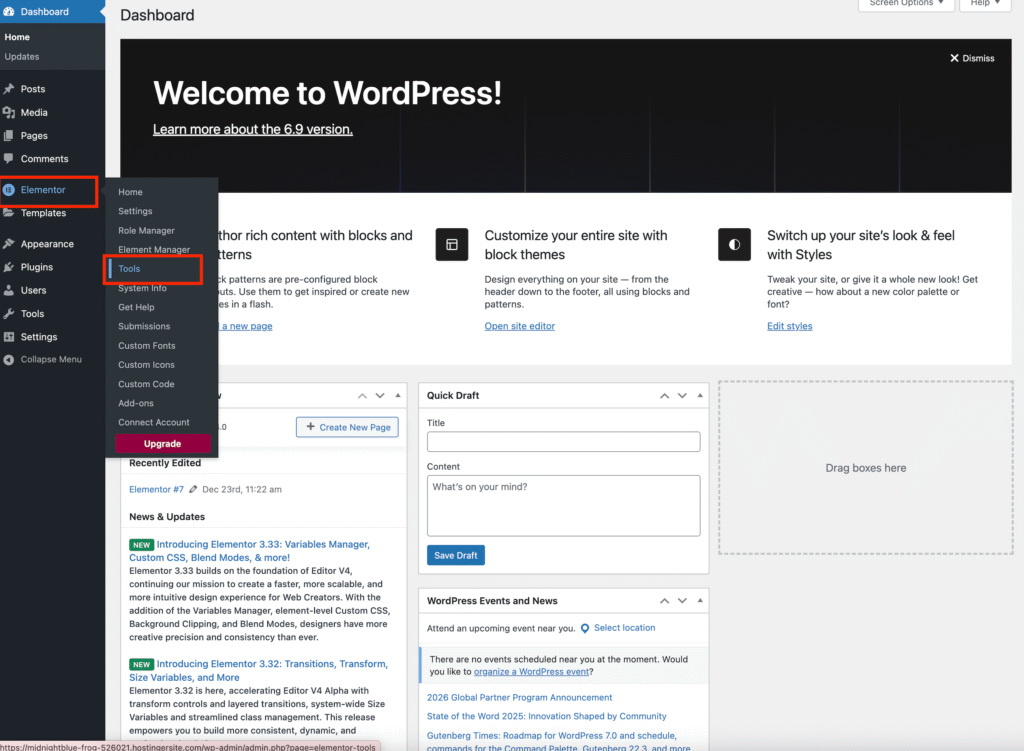
• From your WordPress Dashboard, navigate to Elementor and select tools.
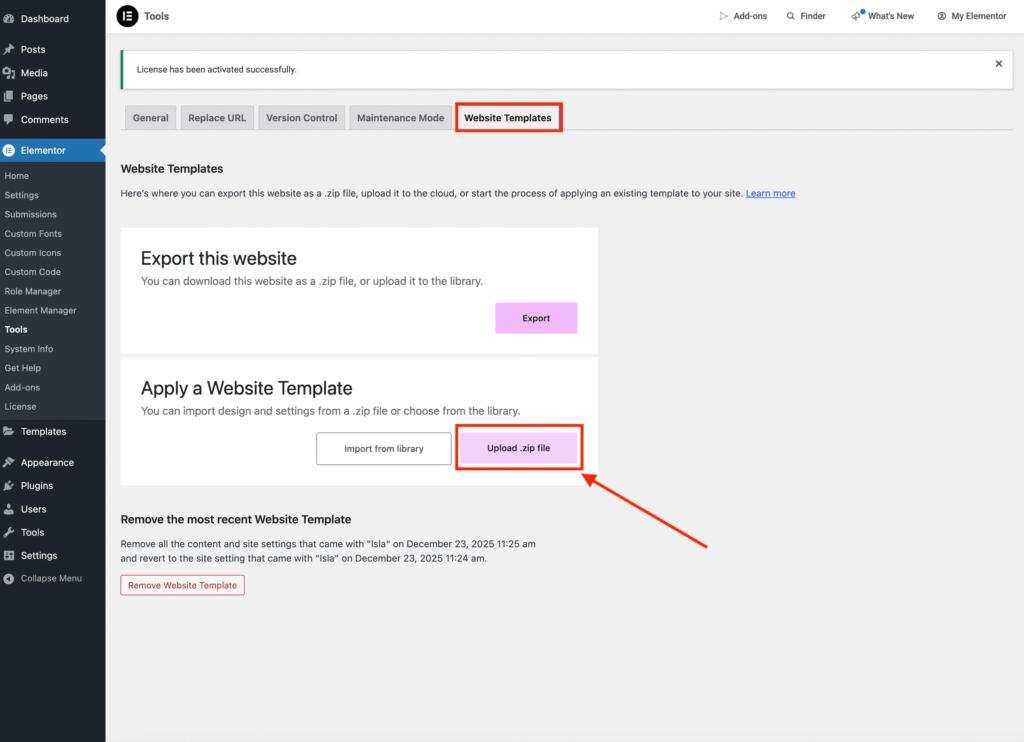
• Select Website Templates from the tabs.
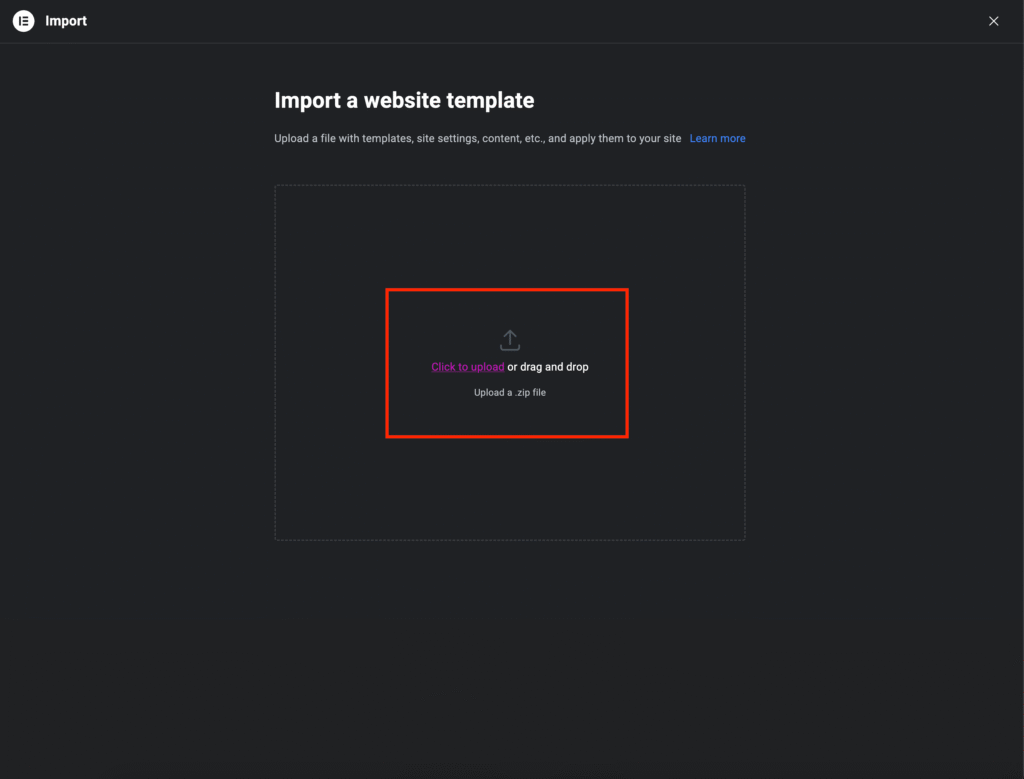
• Click the Upload .zip File button and upload the theme file you purchased.
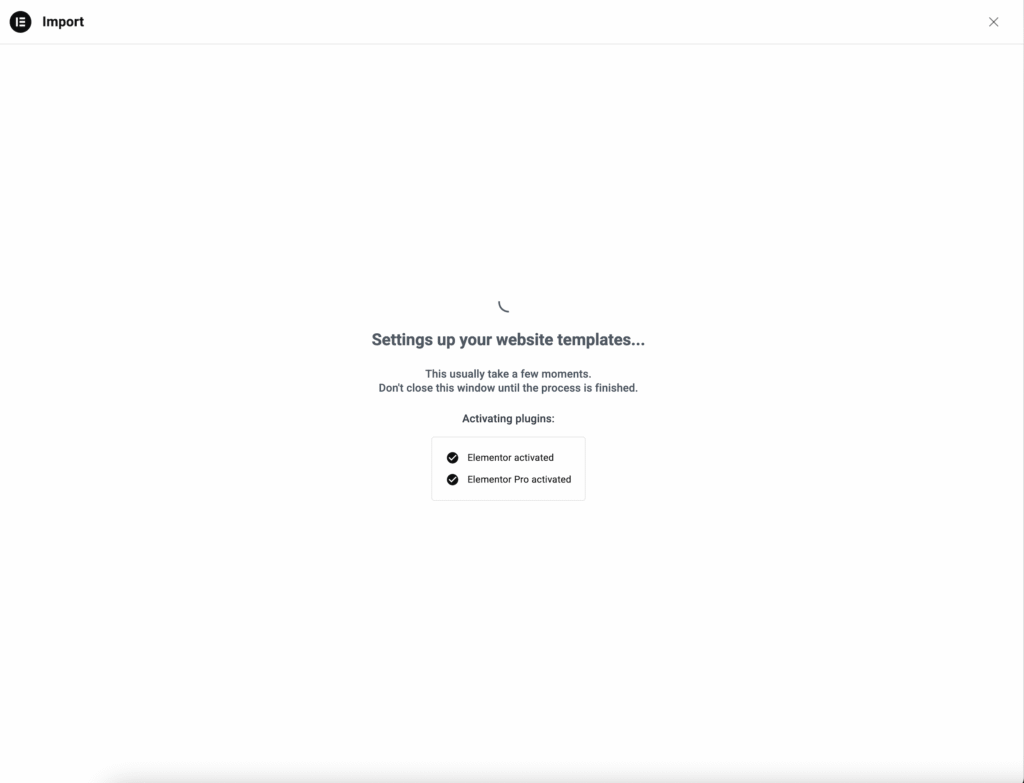
• Click Import and Apply to begin the installation process once the theme upload is complete.
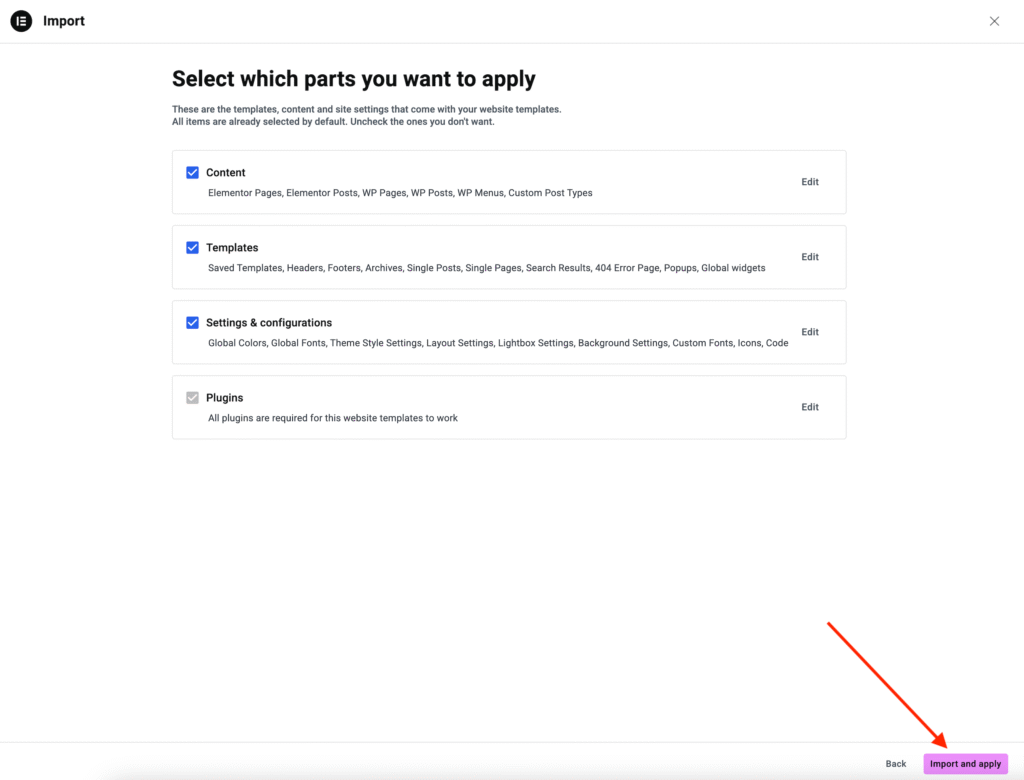
Please wait for the process to complete and do not close the window. This usually takes a few minutes.
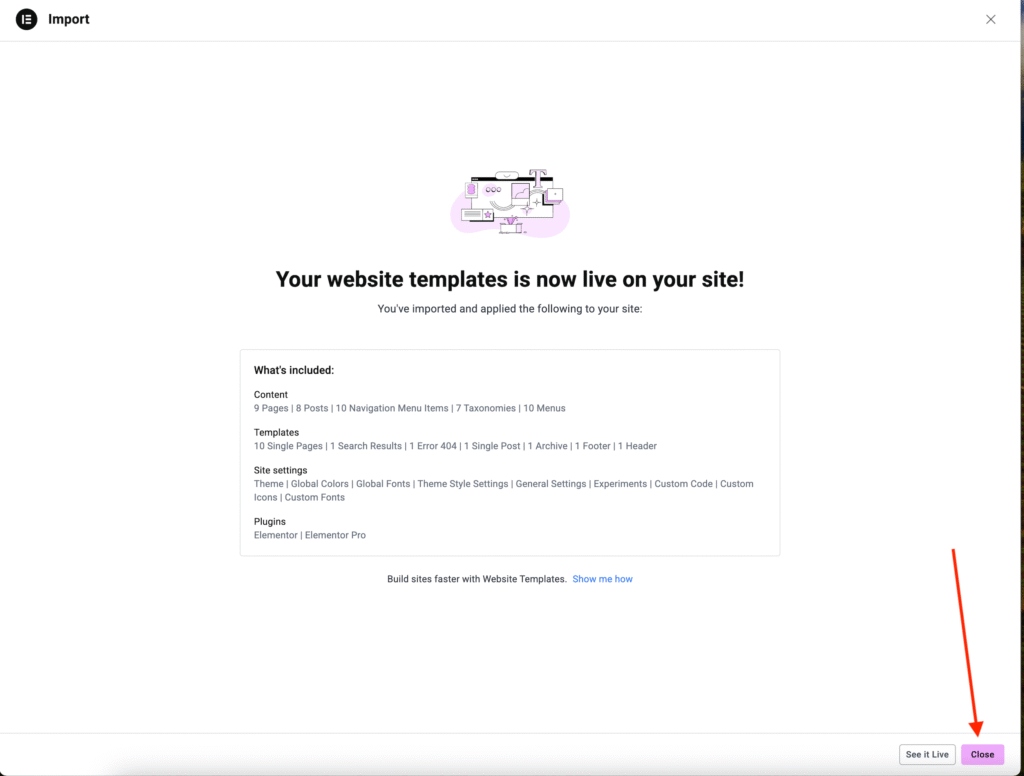
• Once the installation is complete, click Close.
At this point, the pages have been imported, but they still need to be inserted for your site to match the demo.
Assigning Pages
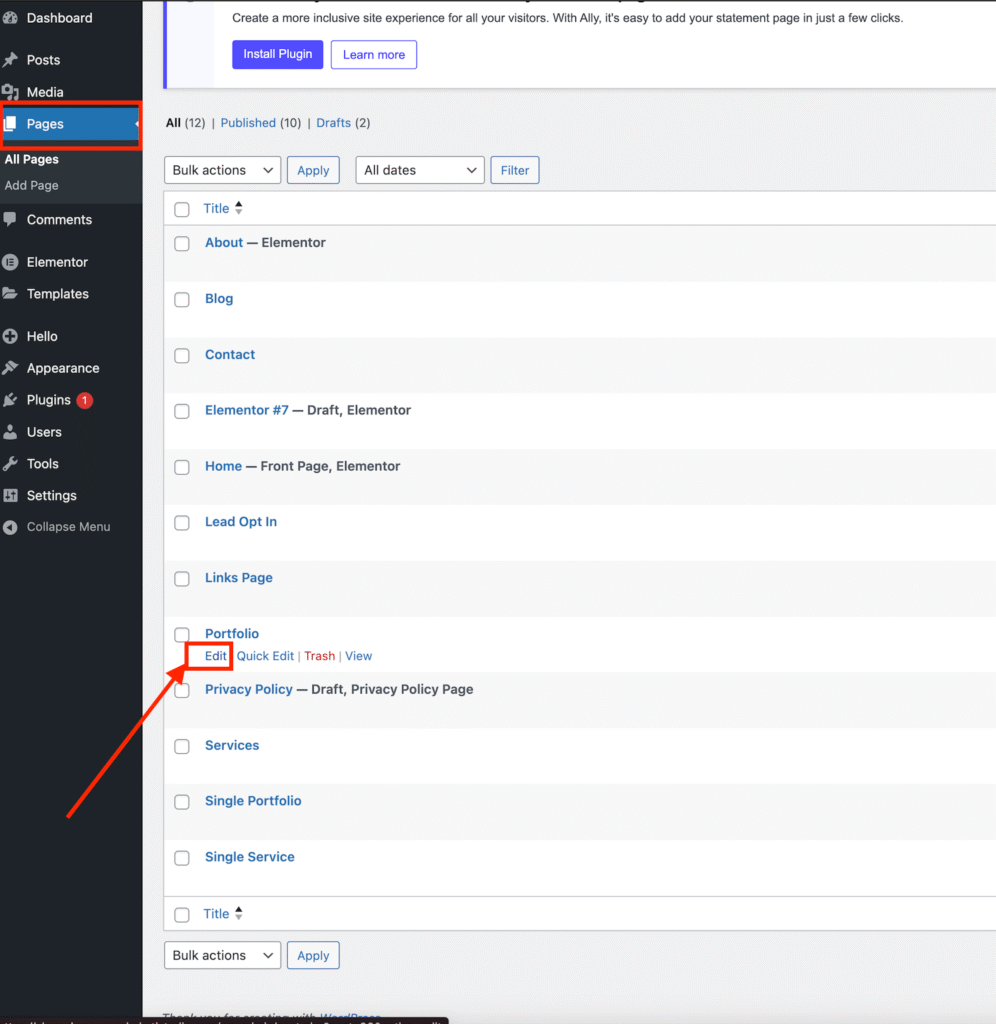
• Go to Pages in your WordPress dashboard and find the page you want to edit. Click the Edit button.
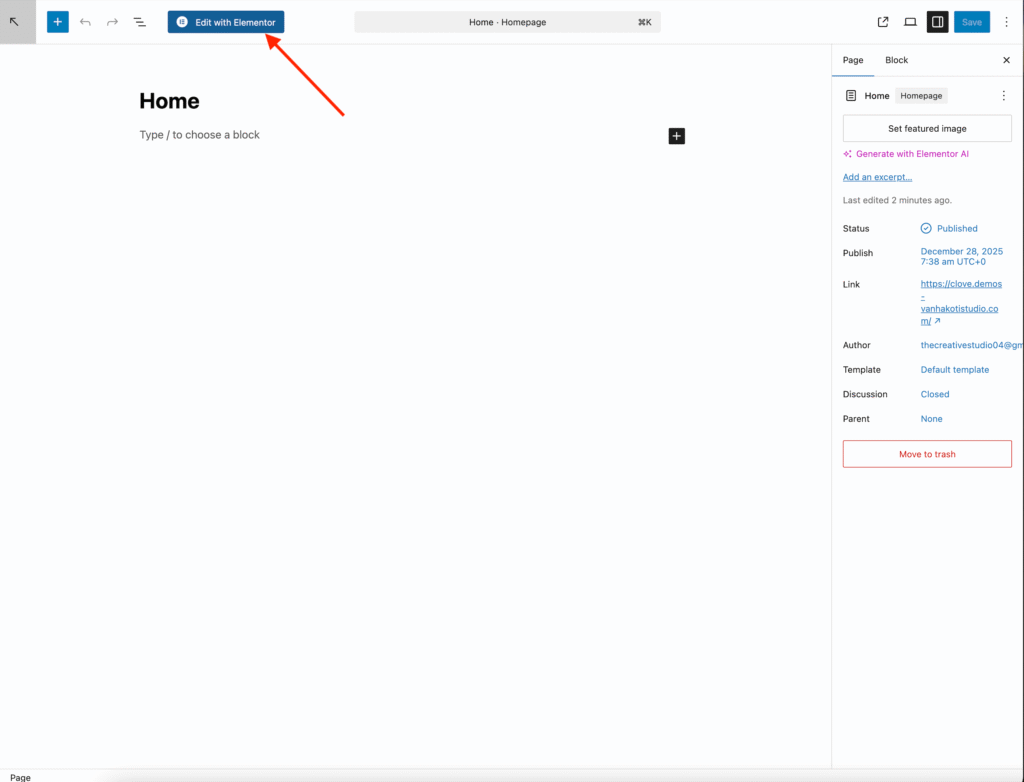
At the top of the page, click Edit Page
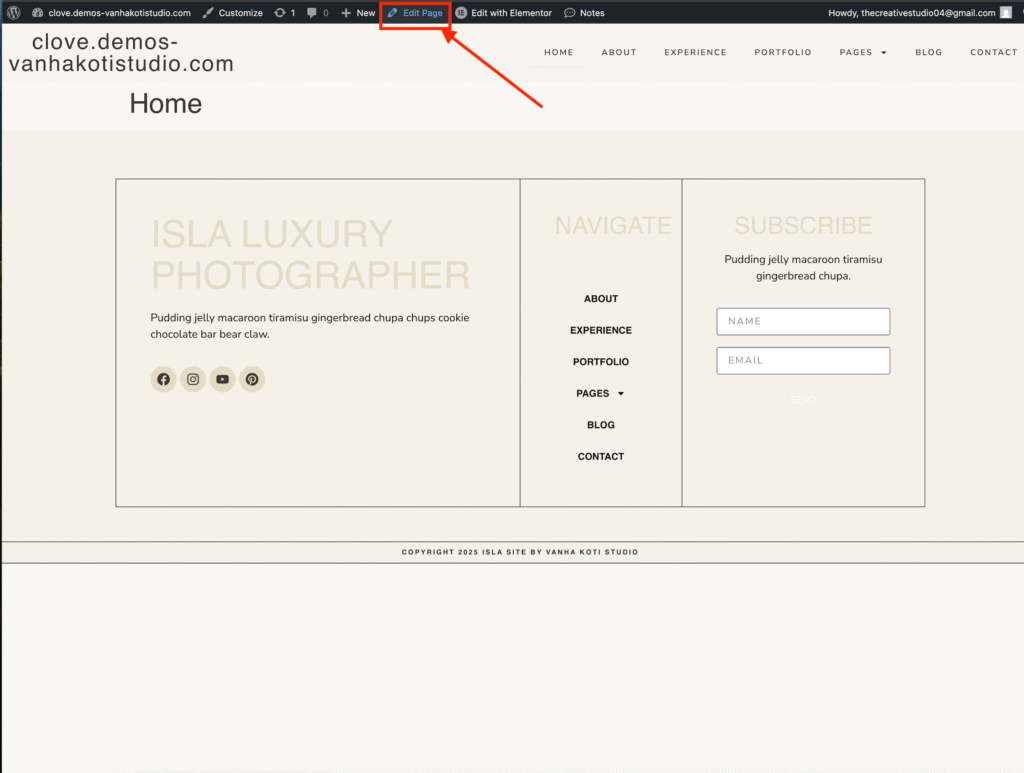
then click Edit with Elementor. This will open the Elementor editor.
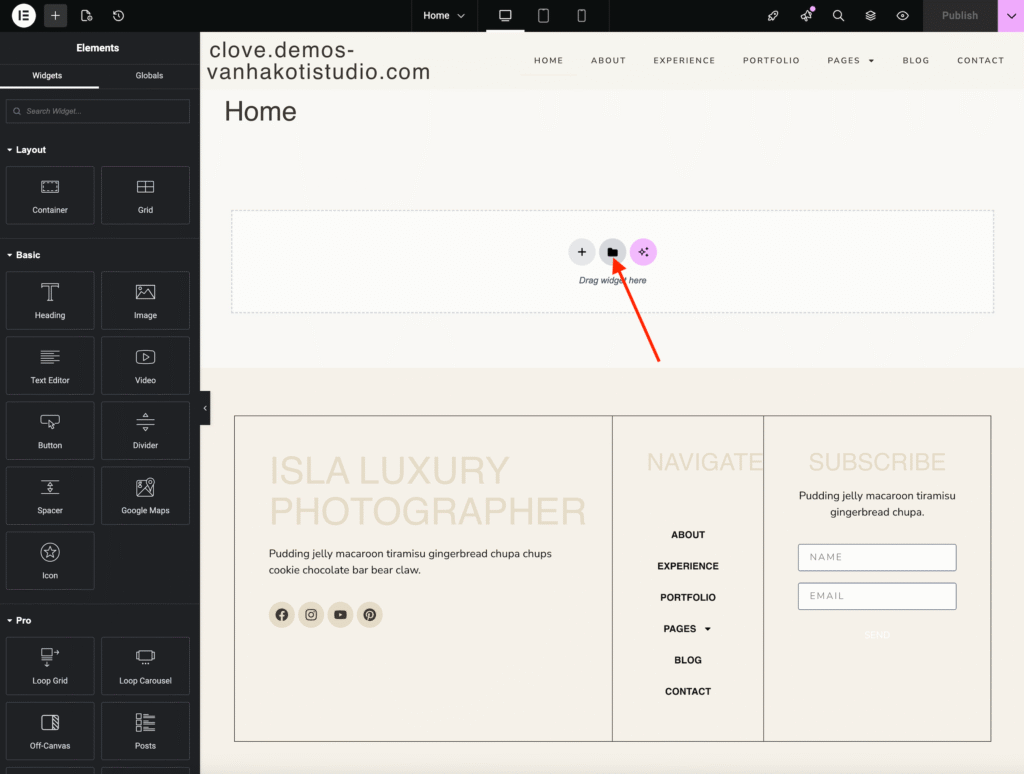
Click the folder icon to open the template library
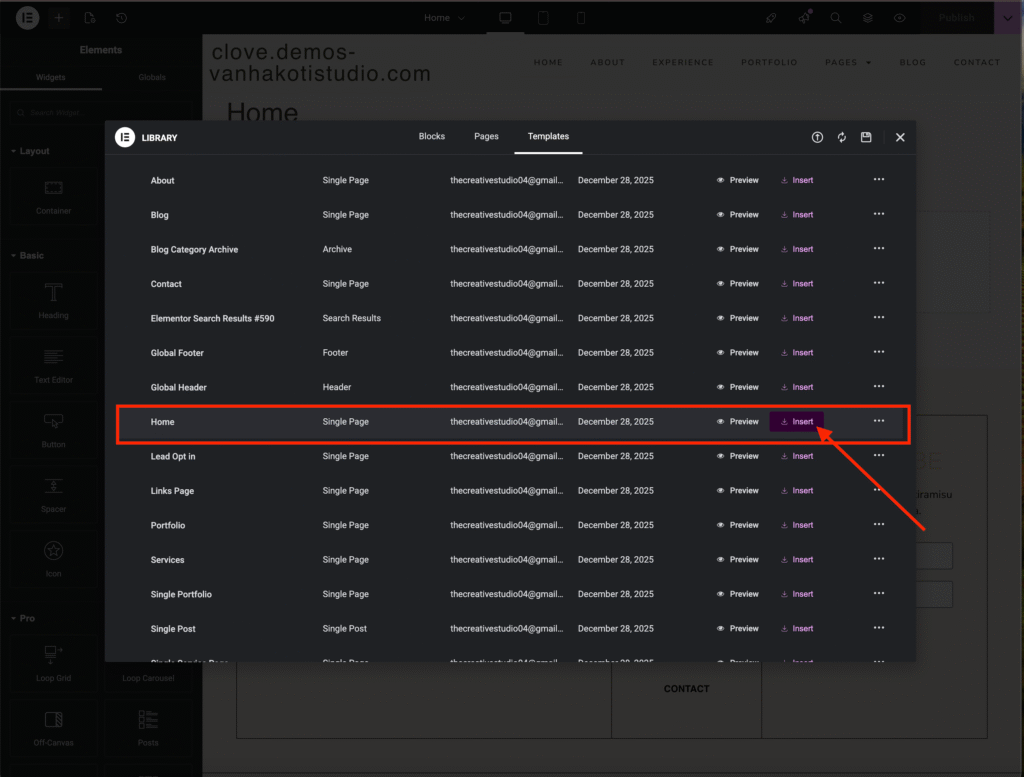
Search for the page template you want to insert (for this tutorial, we’ll use the Home Page) and click Insert.
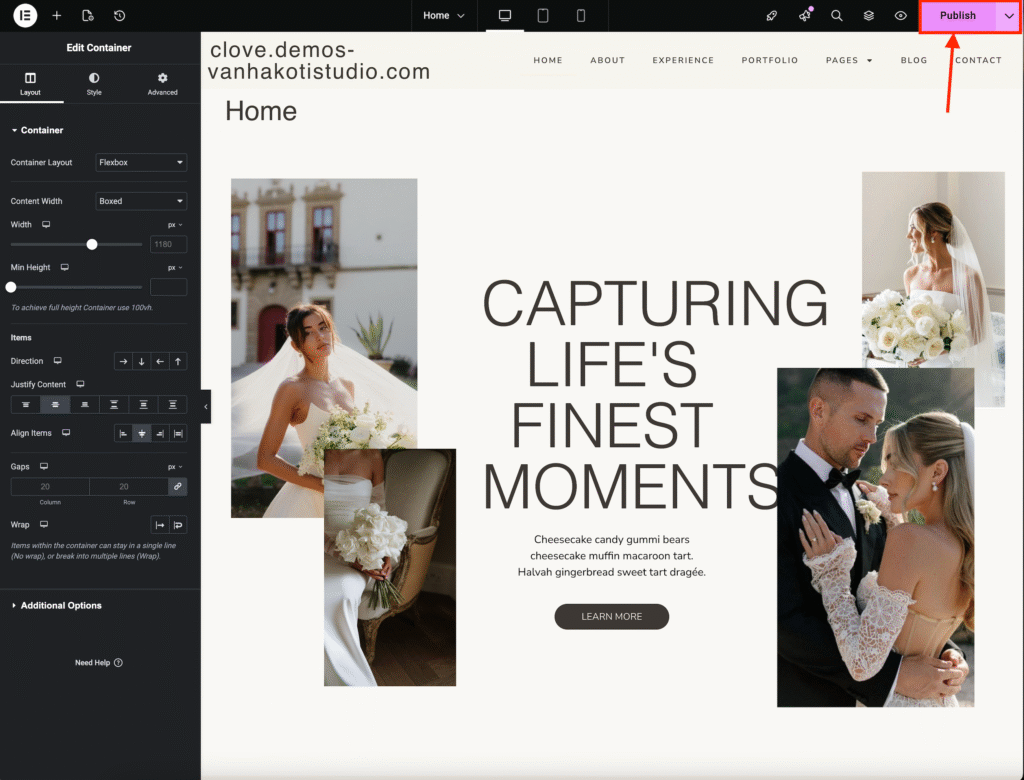
Once the page is inserted, click Publish to save your changes.
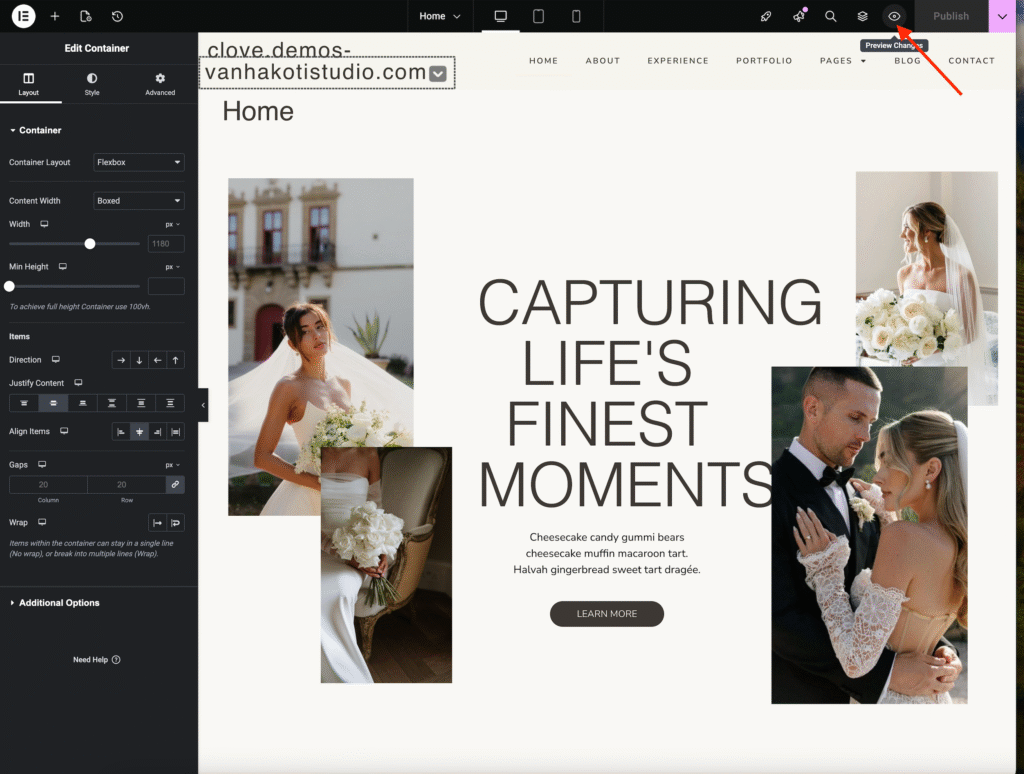
Click the eye icon to preview your changes on the live site.
Repeat these steps for all remaining pages to ensure your site matches the demo design.
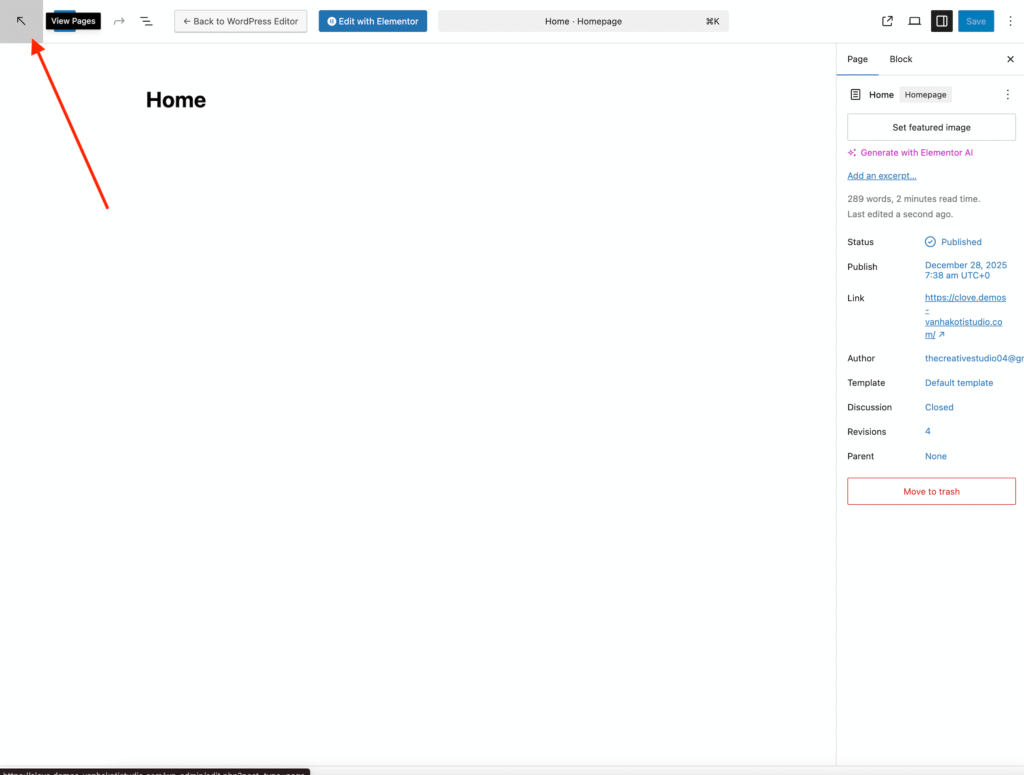
Exiting to Dashboard
Click the Elementor icon to exit the builder and click exit to WordPress button.

Click the arrow icon to take you back to the pages list on your dashboard.